There’s a variety of advice and wisdom available on the net as to how to improve your photography, none of which are worth listening to until you have the basics down pat. Today’s post considers these basics:
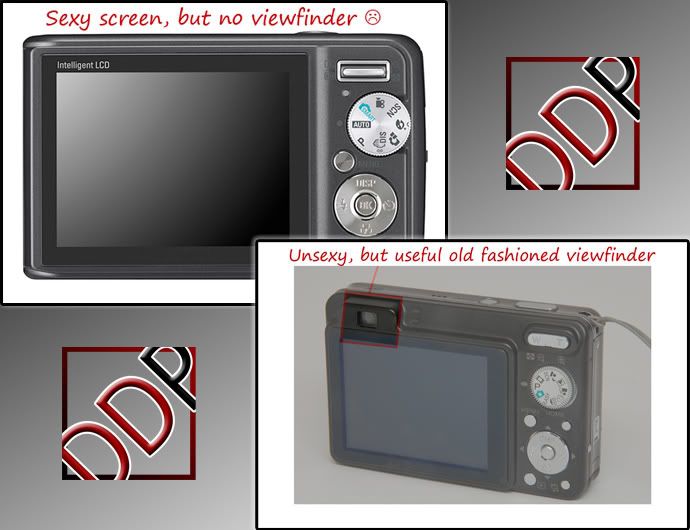
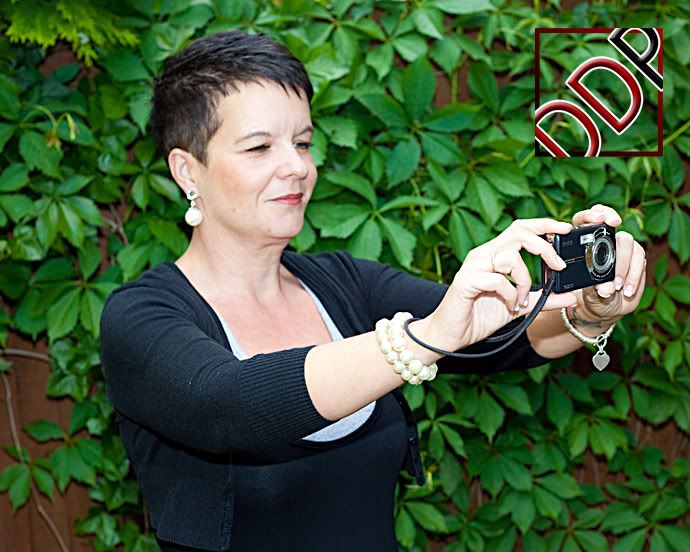
Pretty much every compact digital these days has a big display on the back. It shows in very pretty colours what the camera can see but encourages you to hold the camera at arms length so that you can see through it.
Holding it like this means that you are much more likely to move the camera slightly when taking the shot.
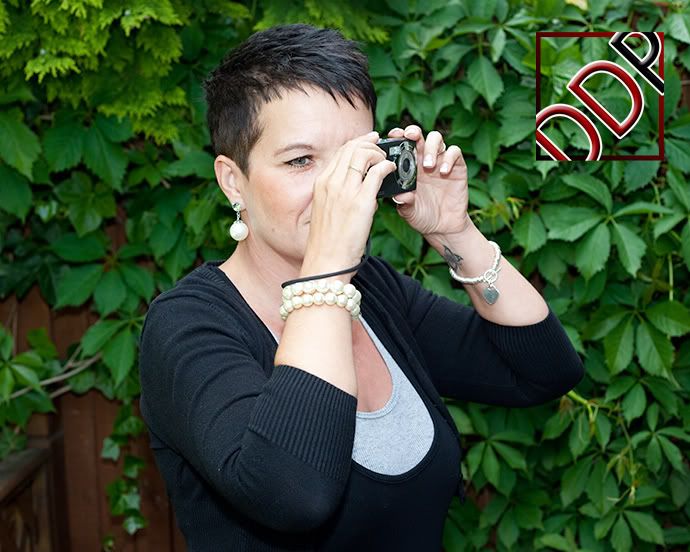
The more traditional method of pressing a camera’s eye piece against your face makes for a much more steady hold. It’s like using a tripod with three legs against one with only two!
If your camera has an “old fashioned” viewfinder, then use it! It might not be so “sexy” but it will help you achieve slightly more sharpness, critical to turning your picture into one you’ll want to keep.
Cameras work by gathering enough light through the lens to make a bright picture. Whenever there is less light around (at night, on gloomy days etc) then the camera will keep the shutter open for longer. This means that you need to hold the camera even more steadily in these conditions. How can you do this?
Firstly – look at your stance. Stand straight, open your feet slightly more than shoulder wide (or kneel on one knee). Lock your body.
Now – make sure that you’re holding the camera correctly, breathe out slowly – hold your breath for a split second and whilst holding it, squeeze the shutter slowly (don’t jab it) and release it slowly (then don’t forget to breathe again!)
Step 1 complete then, your photograph is sharp.
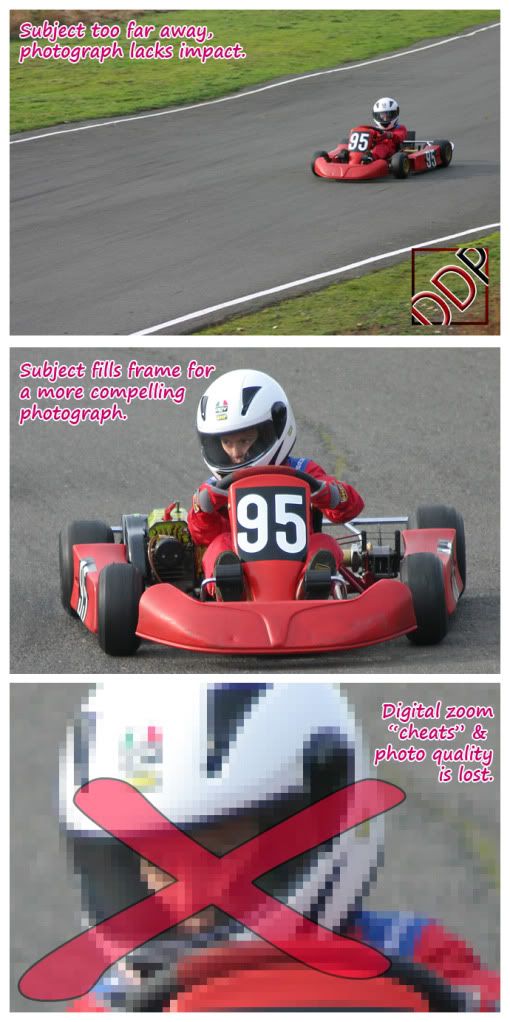
Next – create more impact with your pictures by using one of the two zooms you are equipped with.
Pretty much every compact these days has a decent zoom. As I mentioned previously, ignore the digital zoom (which tries to invent detail that the camera doesn’t actually capture), but use one of the two others at your disposal. You can use the camera’s optical zoom or how about employing your own “foot zoom” (walk closer to the subject you are photographing!)
Getting closer to who you are photographing so that they fill the frame means that you’ll create a connection with the subject and makes for a photograph with much more oomph!
I’ve talked about low light and slow shutter speeds, but what should you do when the sun is out and the light is bright?
This is exactly the kind of situation where your flash can come to your aid. It seems counter-intuitive to use a flash in bright sunlight but consider this. The sun is an (at least occasionally here in the UK) extremely harsh source of light. It’s also very high in the sky. If you take a picture of someone in bright sunlight then you risk very harsh shadows. These often show up worse in someones eyes when the eyebrow’s shade the sun’s light from the eyes themselves – we call this “panda eyes”.
Switch your camera’s flash on (use the “fill flash” option if the camera has it) and the flash will fill in some of the missing light and give you a much more appealing result.
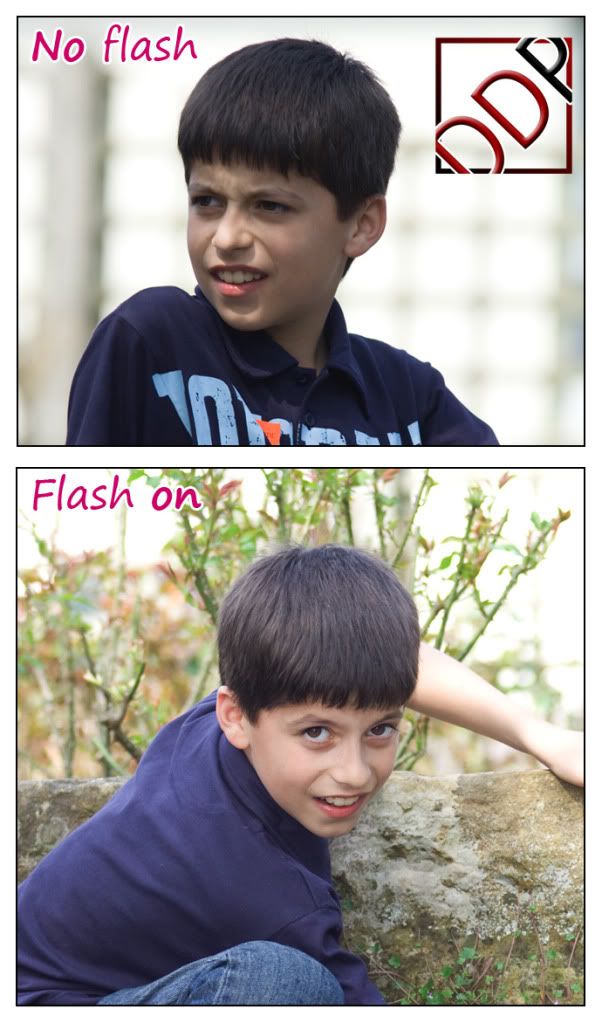
You can also improve your photography on sunny days by making sure that the sun is behind the people you photograph. So long as you are careful not to have the sun “in shot” (which will cause flare and sunspots) then it will provide an attractive halo around the subjects head and again, you can use fill-flash to brighten up peoples faces.

Above all, digital photography makes it exceptionally easy to practice – with the cameras display giving you instant feedback. Learn these principles, know your camera and I guarantee you will produce more compelling pictures far more often than you did before.
Check back soon for the next in my series of “Tips from a professional photographer” and watch your photography take off!

Hey Dan,
ReplyDeletegood series of instructional shots and thoughts. I too always say to beginners to make sure they get a compact with a viewfinder. Beacause, apart from what you said, you just cannot see the screens in sunshine. Madness.
I shall be passing your blog address to a few people I know are starting out in the hobby,
thanks for sharing,
all the best
Noel