Thursday 29 July 2010

North London Photographer: Sneak Preview of Steve & Lindsay's Pre-wedding Shoot

Despite the ever present risk of rain, I spent a very pleasant evening with Steve & Lindsay at Forty Hall in Enfield yesterday. I really enjoy these pre-wedding shoots as it gives me a chance to get to know my wedding couples a little better.

It's always great to photograph a couple very obviously in love, and Steve & Lindsay fitted together really well, in the way that only a couple completely comfortable in, and confident with each other can do.

Lindsay was a natural poser (and I mean that in the best possible way!) and Steve a quick learner.

Here's a sneak preview of some of my favourites from yesterday.

Get the flash player here: http://www.adobe.com/flashplayer


The full gallery will be posted to my website shortly, from where Steve & Lindsay will be able to pick their most loved image for a complimentary print.

Can't wait to see you two married, guys!

Monday 26 July 2010

North London Photographer: Wonderful #WWPW in Enfield

IMG_6313.jpg

Just a quick note of thanks to everyone above here (and the wonderful Mrs D. who took this pic) for making my first ever photowalk such a success.

I had a great time and made some lovely new friends - I really look forward to making next year's walk even better.

You can view some of the images from the day in the Enfield PhotoWalk 2010 Flickr Pool

All the best

Dan

Friday 23 July 2010

North London Photographer: Tips from a Professional #4 - Top 10 Free Software Downloads for Digital Photographers

As a professional, everything I do has to be “top notch”. This is achieved by having the best of everything – cameras, lenses, flashes & lighting accessories & software (not to mention the techniques learned in over 20 years of photography). Now not everyone is in the position to make this kind of investment in what may only be a hobby, but I do strongly believe that with a little bit of time, anyone can make their own photographs better.

As well as my ongoing series of tips on how to take better photos, I’ll be looking at how to make the photos you’ve already taken look better. You probably don’t need to go out and spend £600 on the latest version of Adobe
Photoshop
– you’d be unlikely to use even 10% of its features and the time spent learning to cope with its complexities would be largely wasted. I believe that you’d be far better spending your money on a better camera, lens or some training instead.

In fact – there’s a wealth of software out there which can dramatically improve your photographs and won’t cost you a bean.

Here’s a list of my Top 10 of Free Software Downloads for Digital Photographers.

As a PC user, I will concentrate on those available for Windows, though many of these applications are available for the Apple Mac also.

So, in no particular order:

1. IRFANVIEW
http://www.irfanview.com/


Photobucket

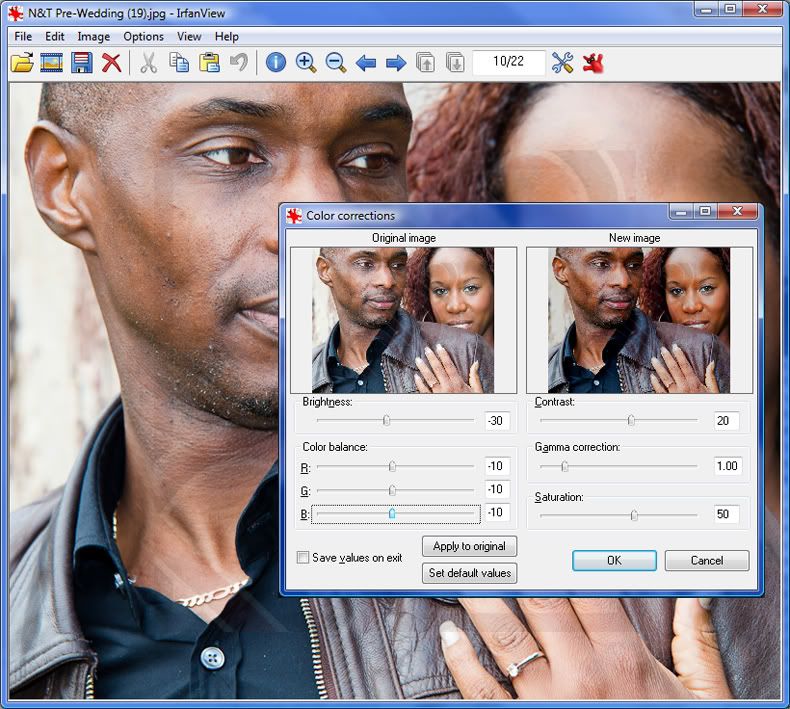
This has been around for as long as I can remember, and began as a simple image viewer. It has developed into an application which will also allow you to optimise your photographs, print them at their best quality, create interesting slideshows and to automatically enhance whole batches of photos in one go.

It still is mainly used as an image viewer, but the extra features are easy to learn and even if you simply use it to crop a few of your images, you’ll be surprised at how much more impact they can have.


2. PICASA
http://picasa.google.co.uk/

Picasa

From the friendly giants at Google, Picasa also allows some basic enhancement of your images (the automatic contrast enhancement can be quite an eye opener) – but its real use is in archiving and managing your photo library.

When you’ve got more images than you can comfortably manage (pretty soon in my experience!) then being able to find a particular photograph quickly becomes a real issue. Picasa will help you do this. It has many of the features found in expensive alternatives like Aperture & Lightroom and is, like everything from Google - free to use.


3. HUGIN
http://hugin.sourceforge.net/


Picasa

One way to get more out of your camera is to take a series of overlapping photographs and then to join them together – making a panoramic (wide) image. It is possible to “stitch” your photos together manually but it’s a slow and tedious job. Software does this much more effectively and Hugin is a free, simple and effective way to do this.


4. GIMP
http://www.gimp.org/


GIMP

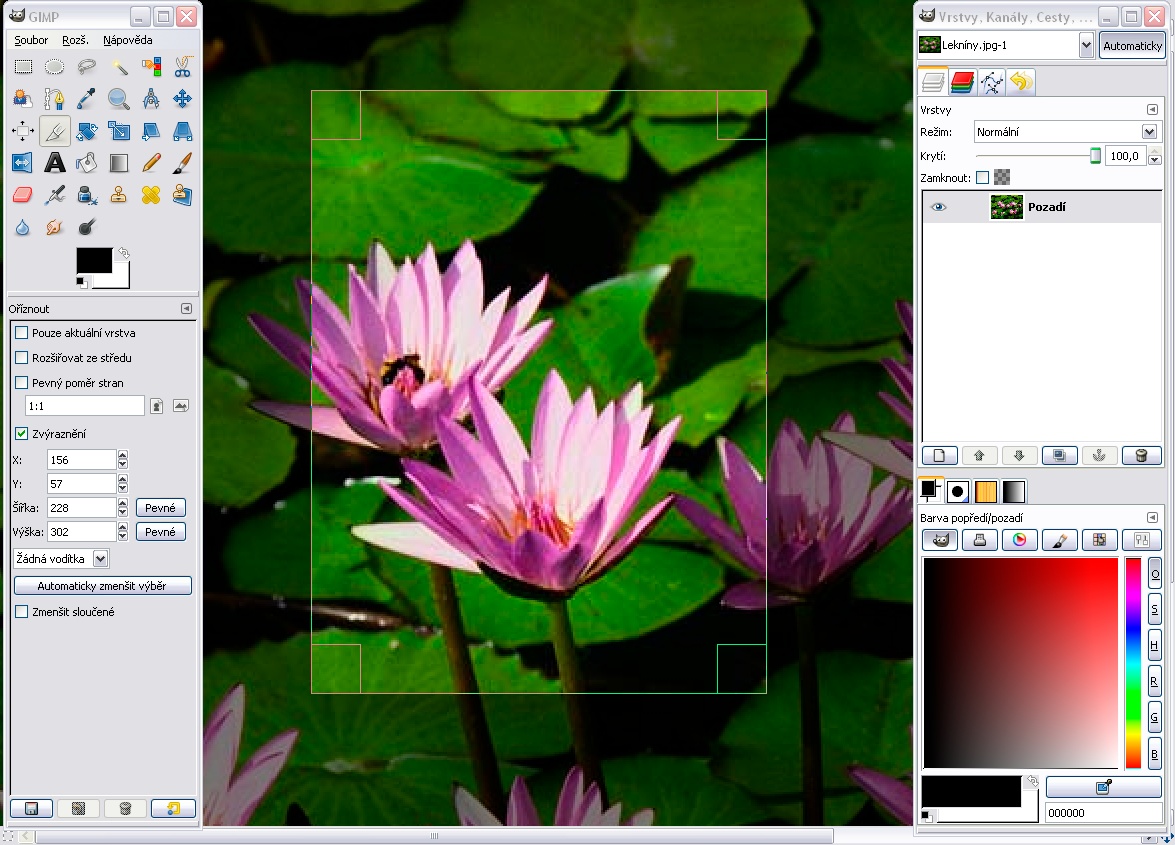
GIMP stands for GNU Image Manipulation Program and is often referred to as the free alternative to Adobe Photoshop.

Features include curves adjustment, selection tools, brushes, gradients, dodge & burn and other image editing essentials. For intermediate and advanced photographers it’s a viable free alternative to a full version of Photoshop, although the somewhat idiosyncratic interface can take some acclimatising to. GIMP is quite advanced, so if you’re a beginner (and you don’t recognise some of the terms earlier in this paragraph) you’d be better looking elsewhere


5. SKYDRIVE
http://skydrive.live.com/


Skydrive

If you’re lucky enough not to have lost data through a computer or hard drive failure so far, then it’s only a matter of time until you do!

Without a good backup of your images, years of your work and precious memories could be lost forever.

SkyDrive allows you to backup your files and photos and offers 25GB of free online storage with password protection, drag-and-drop uploading, and access from multiple locations.


6. PHOTOSHOP EXPRESS
http://www.photoshop.com/


Photobucket

Photoshop Express as the name suggests, is developed by Adobe – the people behind industry standard (and expensive) software like Photoshop CS5 and Lightroom. It’s fast, intuitive and offers 2GB free online storage. It runs online, so there’s no need to install any software on your PC.

Amongst other things Photoshop Express allows you to crop, rotate, resize, adjust exposure, remove red-eye, touch-up, adjust saturation, white balance, highlights, fill light, sharpen or soften your images. It is designed to Adobe’s high standards with an almost obsessive attention to detail. It can “get you out of jail” if you are away from your main PC and need to do a bit of basic image editing.

You can have a quick play with it by clicking here.


7. MEDIACHANCE – CLEANSKIN FX
http://www.mediachance.com/digicam/cleanskin.htm


Clearskin

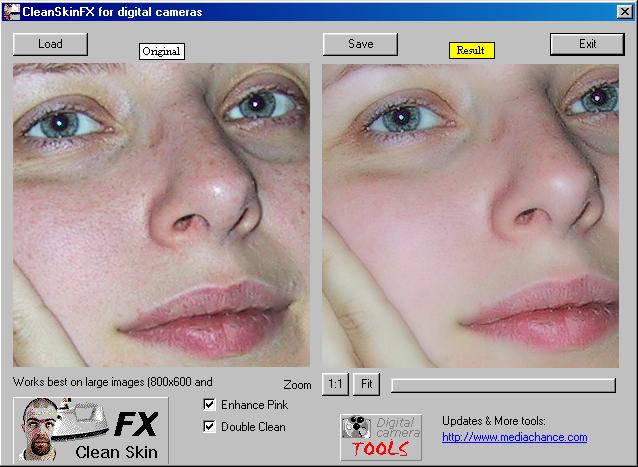
CleanSkinFX is a “one trick pony” but it performs that trick very well. It’s used for cleaning up & smoothing the skin in portrait shots. It retains detail such as hair, eyes and the background but beautifies your subjects with lovely smooth skin.


8 – MEDIACHANCE - FREE DIGITAL CAMERA ENHANCER
http://www.mediachance.com/digicam/enhancer.htm

DCE

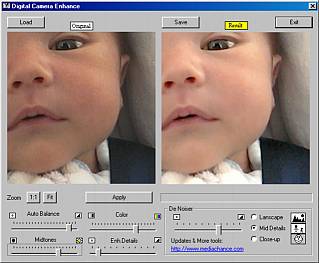
If you’re looking to try and rescue photographs that look a little off then this is a quick and easy way to do it. It corrects colour, shadows and tries to rescue photos that would have been great "if only the flash had fired".


9. PHOTOFILTRE
http://photofiltre.free.fr/frames_en.htm


PF

PhotoFiltre is a basic, but capable image editor. It offers a simple, elegant user interface with a lot of one-click image adjustments, filters, and effects. It’s very good at helping you navigate your disks for image files, and once found has decent drawing, painting, retouching and selection tools. It can be used to batch enhance multiple images effectively.


10. NEAT IMAGE
http://www.neatimage.com/download.html


Photobucket

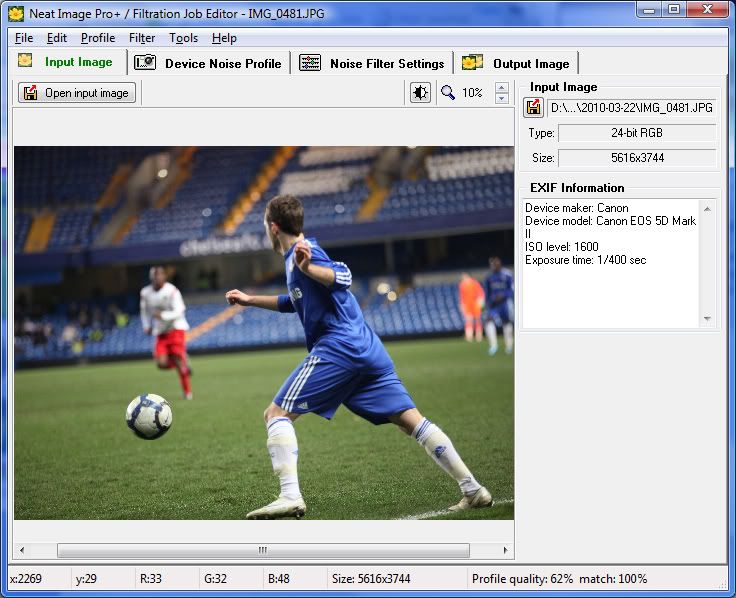
Images taken in dark conditions often suffer from lots of digital noise

PF
this dappling effect reduces the quality of pictures taken in such conditions.

The Demo edition of Neat Image is free for private use. Don't be thrown by the name - it's fully featured. Professional editions are available costing up to $75 US. The way in which it removes the noise is identical to the expensive edition, but the free one limits you to removing noise one file at a time.

The results can be extraordinary: all the noise - and only the noise - is filtered out, leaving the rest of the image sharp and clear. The really surprising result is that fine detail is retained, even when the detail is so small that it's apparently finer than the noise itself.

So, there you have it. Ten pieces of free software that can be used to help you get the best out of your existing and future photographs. In the weeks and months to come I’ll talk more about how to use some of these to get the best results possible. Keep checking back for details.

Until then – keep taking photographs!

Dan

Saturday 10 July 2010

North London Photographer: Tips from a Professional #3 - Photographing Pets & Animals

In the third of my occasional series of hints and tips, I look at a typical subject for everyday shooting; family pets and other animals.

Like the rest of this series, I will concentrate on technique. I firmly believe that good photography is a function of good technique & emotional contact with the subject and not solely the result of the most expensive equipment or the most up to date software.

So, with the weather set fair, why not put some of these tips into action and grab some great shots of the four legged friends of your family.

-------------------------------------


Many of these tips are equally important when photographing humans & that is certainly the case for my first piece of advice:

1. FILL THE FRAME.

Whilst you may need to be a bit careful when photographing crocodiles or tigers, most domestic animals are really quite friendly. There really is no excuse not to have your subject dominating the frame. Get in close for impact!

Photobucket

2. DON'T BLAST WITH FLASH.

Unlike humans, Dogs & Cat's don't suffer with "red eye" where the light from a camera's flashgun reflects back to the camera as a glowing, demonic red, but they do suffer with "green eye". Worse still, many have silky, shiny fur which will also badly reflect the light from a camera flash. Rather than shooting indoors or at night, try and capture your pet outdoors in normal daylight. Don't pick the middle of the day when the light is overhead and strong, but morning or evening, or even an overcast day will help you best.

This way, the flash use will be at a mimimum (remembering my advice about "fill flash" here), the shine and "green eye" will be controlled, and your photograph will be more natural and much more pleasing.

Photobucket

3. GET DOWN TO THEIR LEVEL.

Shooting your pet whilst you stand up will mean that you're looking down on them. Unless (like in the example below) you are looking to emphasise their diminuative stature, then you should try and shoot from their eye level. See the world from their perspective and you'll get a more natural portrait of your animal.

Photobucket

4. FOCUS ON THE EYES.

Every good portrait must have the eyes in focus. This is true of humans or animals. An added complexity of many animals over humans is the length of their snouts.

Autofocus cameras generally try to focus on the closest thing to the lens. In the case of dogs, horses or here donkeys! their long faces mean that this is often the tip of the nose.

Photobucket

To avoid this you need to learn the focus/recompose trick. When looking through the viewfinder, or on the back screen of your camera, the points of focus are generally shown as small boxes or crosses. When the camera focuses, these light up in red. If this is focussing on the snout then hold the focus point (cross or box) over the animals eyes. Half press down the shutter. This will "lock" the focus at that distance. You can then "recompose" the picture by slightly moving the camera so that it is framed as you wish. Without lifting your finger, fully press the shutter and the picture will be taken, the eyes will be in focus, and the snout pleasantly blurred.

Photobucket

(See here for a more detailed explanation of this trick)

5. CONSIDER THE BACKGROUND

Try and photograph your pets against a background that is complimentary to their colouring. Your eyes should be drawn to the pet itself, and bright spots in the background or similar will distract the viewer away from the pet.

In the example below, with the black dog, the eyes are drawn to the video recorder in the background and away from the animal itself. The complimentary, evenly coloured background in the image of the blue marl collie contains nothing to distract from her friendly face.

Photobucket

7. CAPTURE THEM BEHAVING LIKE ANIMALS.

If you ask your children to sit still, bolt upright and force a grin, you'll get some horribly staid, obviously posed, almost starched shots. The same is true for portraits of your pet. If you want to capture an image that really says something about the animal, then why not try and catch it "in action". Photograph it doing what it loves to do. Running, chasing a ball, stalking it's toys are all examples of perfect opportunities for greating great memories. Remember you can take as many shots as you like, delete all the duff ones and keep the one or two that really do work. These are the pictures that will most make you smile when you look back in years to come.

Photobucket

I hope that you've found these helpful. Put these tips into practice and you'll be surprised at how much they can improve your photography. Use the comments below to drop me a message linking to any photographs you take that follow these tips. I'd love to see them.

Keep snapping!

All the best.

Dan

Wednesday 7 July 2010

North London Professional Photographer: Corporate Portraits for Friendly St. Albans' Solicitors

Photobucket

A tough assignment this week, as I was tasked with making solicitors look human! All jokes aside, my clients were a friendly and welcoming partnership in St. Albans, and they, alongside their web-designer had asked me to create some portraits of the partners to show them both as professional and approachable.

Photobucket

One of the keys to this kind of assignment is the need to work at speed. We utilised a corner of one of the partners office for the initial shots, before lugging my lights around the building to capture each partner in their own offices.

Photobucket

Making each partner comfortable in front of the camera in the minimum time possible meant that we got the shots we wanted with the minimum disruption. Each client spent less than 10 minutes with me - with the rest of my time being taken up with ensuring that everything was set up to get me the shots I wanted first time, every time.

Photobucket


Photobucket

I then had the unusual pleasure of being able to spend an hour or so walking through the town centre capturing some of the local sights and vista's - looking for shots that could be used as banner illustrations on their new website currenly being crafted by the experts at e-WebConsulting.


Photobucket

If you want better images for your family or business then keep reading this blog. In the weeks to come I'll be showing you how you can improve your own photography and create more memorable, more engaging images.

Photobucket


Until then, all the best.


Dan